If you love making your products at home, this is going to be a fun read. You’ll learn DIY soap making in three different ways.
To make a bar of soap at home, you need the following ingredients:
- Sodium hydroxide or caustic soda/soap base
- Water
- Oil
- Colorant
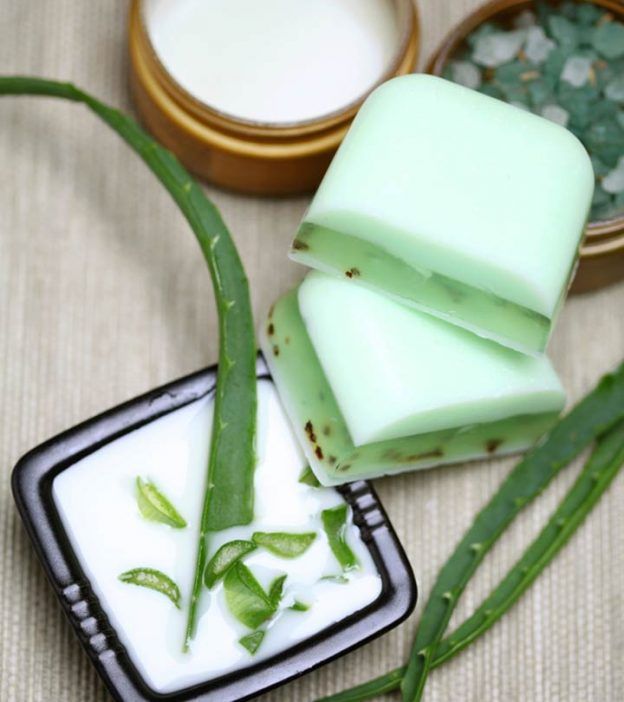
You can personalize your soap by adding other products like aloe vera, saffron, neem leaves, glycerine, or cocoa for antioxidant, scrubbing, or moisturizing properties.
Yes, it’s that simple so let’s get to the process now.
DIY Soap From Scratch
Making soap from scratch is no rocket science. It’s an easy and interesting activity that you’d truly enjoy.
Now, we will see how you can make homemade soap from scratch.
What you’ll need:
- Caustic soda
- Measuring cup
- Water
- Fragrant
- Colorant
- Any oil you like
Process:
Once you have the items needed in the soap making, it’s time to begin.
- Scoop out a cup of caustic soda (start with less for experimenting) and put it in the measuring cup.
- Pour in a little amount of water into the cup to make a liquid mixture.
- Mix and set aside
- You have to put a cooking pot on the stove or microwave and pour your favorite oil (I’d suggest Olive and Coconut). Let it heat for 30 seconds to one minute.
- Once the oil is lukewarm, pour in the caustic soda mixture, fragrant for fragrance and colorant for color, in the pot and mix it well. You can use a mixer as well.
- Once the mixture is in good consistency, turn off the mixer.
- Put the mixture in the silicone tray and freeze it for 15 minutes.
- Celebrate because you’re done.
Tip: You can minus colorant and fragrant because it’s optional.
You have the soap mixture ready. Do you want to minus the ‘mixture making’ hassle? Don’t worry. I’ve got it covered for you.
DIY Soap from Soap Base- Melt and Pour
A soap base helps you avoid the temperature dealing steps. It’s rather simple, and you just have to pick a soap base. They are available in different shades, but I’d suggest a clear base to make soap, so it picks up the color easily.
What you’ll need:
- A transparent or white soap base
- A knife
- Measuring cup
- Colorant
- Fragrant
- Soap molds
- Rubbing alcohol
Process
The soap-making process, with a base, takes hardly 30 minutes. It’s quick and hassle-free.
- Take out the soap base and cut it into cubes.
- Collect the cubes and put them into a measuring cup. You have to take as many cubes as you need to prevent wasting of the product.
- Once the cubes are measured, heat them in a microwave for a minute. Remember, it shouldn’t burn, and you can check by mixing the solution. If they need more heat, put them back.
- The solution is ready! Next step?
- This is where you use fragrant or colorant in the solution. Well, your choices aren’t limited. You can add ingredients depending on the kind of soap you want.
- IF you need scrubbing soap, add coffee.
- IF you want a moisturizing soap, add essential oils and glycerine.
- IF you want to add antioxidants in your skincare, add neem or aloe vera gel.
- When you add any liquid, stir the pot gently, so it all gets mixed.
- Once your mixture solution is ready, pour it into the soap mold. You can have them in mini size or any shape you like!
- Before you put the molds to freeze, always spray rubbing alcohol over to disperse oxides.
- Place the mold in the freezer and let it sit for 10 to 15 minutes.
- If it’s frozen nicely, you can start using them right away. If not, try five more minutes.
This was the melt and pour soap making that you can try any day. Just make sure you use everything with measurement; otherwise, you’ll have to restart the entire process.
Make Soap Re-batching Process
If you are unsure about using lye due to the precautions, you can go for a safer alternative: the lye-free soap-making process or rebatching.
It’s an engaging procedure that you’d surely love. Plus, it’s cost-effective. You collect the soaps or soap leftovers you already have and melt them to make a new soap.
Tip: the rebatching DIY process is also a lifesaver if results from the above experiments do not succeed as you wanted.
What you’ll need:
Soap
Cheese grater
Utensil
Water or milk
Additional ingredients
Silicone molds
Process
The soap rebatching will give you the chance to fix the errors that you may have made previously. It helps you use the soaps, so there’s no waste.
- Pick up the soaps you need to rebatch.
- Grate them or make small pieces.
- Put a pot on the stove or use a microwave utensil to melt the solid soap.
- Mix either water or milk.
- Stir slowly until the mixture thickens.
- You can add anything to the mixture at this point and keep mixing gently.
- Once the mixture has cake batter thickness, your soap is ready.
- Pour the mixture into the silicone molds and put them to freeze.
- If you’re not using the freezer, leave the soap out for 24 hours.
There’s More…
The homemade soap recipes I’ve shared with you are basic and leave little space for customization like shapes and flavors, but there’s always a way, right?
You can take different beakers to mix different solutions with the soap base and let them freeze. Next, you can pour layer after layer in the soap mold.
Precautions
- Always measure your ingredients before you put them to heat.
- Wear gloves and goggles whenever you’re working with caustic soda or lye
- When you’re trying out the DIY soap from lye, make sure that you pour the lye into the water, not otherwise.
- White vinegar can help you in the unfortunate case of a lye spill on the skin.
- No matter which way you go, always do your experiment in an open or ventilated area.
- Wear aprons, so your clothes stay clean.
- Keep products near you.
- Use different utensils for different mixtures. Don’t reuse lye utensils for any other thing.
- Do proper research before you decide to make soap at home.
- Make sure you’re not allergic to any ingredients before adding them.
This was a quick precaution list to keep you safe.
Conclusion
The soap making recipes that I shared with you in this blog will not only help you achieve your desired skincare, but if you get hold of it, you can start your organic soap making company based on the results you observe.
Whatever you choose, we wish you the best of luck!